Talking to the the Zabbix JSON API

Hey there, I recently tried to get some info out of my Zabbix instance to use in another context and therefore had a look at Zabbix’ API.
Turns out, it is quite simple to use and works with JSON messages.

Communication flow is pretty simple:

  1. Send username and password to the API
  2. Retrieve Auth-Token from API
  3. Send your actual query to the API and append the Auth-Token
  4. Retrieve queried data from API

To test communication, I wrote a simple PHP script to fiddle around with the possibilities of the API:


<?php

/* 
          _     _     _      
 ______ _| |__ | |__ (_)_  __
|_  / _` | '_ \| '_ \| \ \/ /
 / / (_| | |_) | |_) | |>  < 
/___\__,_|_.__/|_.__/|_/_/\_\  - API PoC

2012, looke

*/

$uri = "https://zabbix.foo.bar/api_jsonrpc.php";
$username = "testuser";
$password = "xyz";

function expand_arr($array) {	
	foreach ($array as $key => $value) {
		if (is_array($value)) {			
			echo "<i>".$key."</i>:<br>";
			expand_arr($value);
			echo "<br>\n";
		} else {			
			echo "<i>".$key."</i>: ".$value."<br>\n";
		}		
	}
}

function json_request($uri, $data) {
	$json_data = json_encode($data);	
	$c = curl_init();
	curl_setopt($c, CURLOPT_URL, $uri);
	curl_setopt($c, CURLOPT_CUSTOMREQUEST, "POST");                                                  
	curl_setopt($c, CURLOPT_RETURNTRANSFER, true); 
	curl_setopt($c, CURLOPT_POST, $json_data);
	curl_setopt($c, CURLOPT_POSTFIELDS, $json_data);
	curl_setopt($c, CURLOPT_HTTPHEADER, array(                                                                          
		'Content-Type: application/json',                                                                                
		'Content-Length: ' . strlen($json_data))                                                                       
	);
	curl_setopt($c, CURLOPT_SSL_VERIFYPEER, false);	
	$result = curl_exec($c);
	
	/* Uncomment to see some debug info
	echo "<b>JSON Request:</b><br>\n";
	echo $json_data."<br><br>\n";

	echo "<b>JSON Answer:</b><br>\n";
	echo $result."<br><br>\n";

	echo "<b>CURL Debug Info:</b><br>\n";
	$debug = curl_getinfo($c);
	echo expand_arr($debug)."<br><hr>\n";
	*/

	return json_decode($result, true);
}

function zabbix_auth($uri, $username, $password) {
	$data = array(
		'jsonrpc' => "2.0",
		'method' => "user.authenticate",
		'params' => array(
			'user' => $username,
			'password' => $password
		),
		'id' => "1"
	);	
	$response = json_request($uri, $data);	
	return $response['result'];
}

function zabbix_get_hostgroups($uri, $authtoken) {
	$data = array(
		'jsonrpc' => "2.0",
		'method' => "hostgroup.get",
		'params' => array(
			'output' => "extend",
			'sortfield' => "name"
		),
		'id' => "2",
		'auth' => $authtoken
	);	
	$response = json_request($uri, $data);	
	return $response['result'];
}

$authtoken = zabbix_auth($uri, $username, $password);
expand_arr(zabbix_get_hostgroups($uri, $authtoken));

?>

If everything worked, the scripts output should look something like this:


0:
groupid: 5
name: Discovered Hosts
internal: 1

1:
groupid: 2
name: Linux Servers
internal: 0

2:
groupid: 7
name: NAS
internal: 0

3:
groupid: 6
name: Routers
internal: 0

4:
groupid: 3
name: Windows Servers
internal: 0

5:
groupid: 4
name: Zabbix Servers
internal: 0

Important
Authentication method is user.authenticate and NOT user.login as mentioned in the manual.

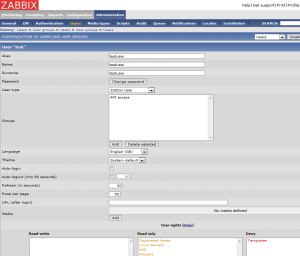
Setting up a Zabbix user with API access
Additional info
http://www.zabbix.com/documentation/1.8/api/getting_started
Integrating BlueCoat Proxy SG Access Logs into Splunk

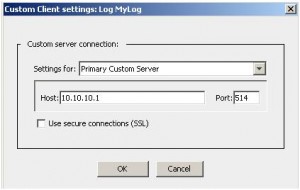
Recently, I had to integrate access logs from BlueCoat’s SG series webproxy into Splunk. The basic approach is quite simple, create a new Log in the SG’s Admin GUI, assign a log format to it and select “Custom Client” as upload client. On Splunk side, create a TCP input and route the data to the index of your choice:

/opt/splunk/etc/apps/bluecoat-sg/default/inputs.conf:


[tcp://1514]
index = bluecoat-sg
sourcetype = bluecoat-sg-accesslog

If you don’t use continous upload, you might want as well strip away the header that comes with the logs.
/opt/splunk/etc/apps/bluecoat-sg/default/props.conf:


[source::tcp:1514]
SEDCMD-bc1 = s/(?mis)^\#Software:.*$//g
SEDCMD-bc2 = s/(?mis)^\#Version:.*$//g

Ok, so far so good. BlueCoat also offers the possibility, to transfer the logs secured with SSL.

Here’s where the problem starts: Unfortunately, BlueCoats SGOS has a bug that doesn’t let you enter a hostname as “Custom Client” target, instead it only accepts IP addresses. Now, if your Splunk system has a TCP-SSL input and the certificate it uses doesn’t have an alternative DN set to the IP address of itself, SSL logtransfer won’t work for you. BlueCoat requires the DN of the certificate to match the value entered in the “Host” field of the “Custom Client”, otherwise it doesn’t send the logs. The only workaround until now is to re-issue the certificate with an alternative DN set to the Splunk systems IP address:


X509v3 Subject Alternative Name:
DNS:mysplunkidx.intern.local, DNS:10.0.0.110

Strangely, BlueCoat’s support didn’t know of that issue yet, so we filed a bug for this.

Links:
https://kb.bluecoat.com/index?page=content&id=KB4294&actp=RSS

Using Google Authenticator for Two Step Auth with SSH

If you run servers that are accessible from the internet, you might have noticed the many many brute-force login attempts to random accounts against your system. While the risk, that one of these brute-force attempts succeeds is very low (if you chose decent passwords), one might come to the conclusion, that simple user- and password authentication is not safe enough for complete peace of mind.

Here is where two-factor auth comes to play. Until now, there were not so much options if you didn’t want to spend any money. Here is where Google Authenticator comes in handy: It makes two-factor auth accessible for the greater public.
It consists of two components:

  • An app for your smartphone, that spits out verification codes
  • A PAM module for you linux box, to validate the verification codes

In this article, I will explain how to get and install the Google auth PAM module for Linux.

First, you have to prepare a build environment by fetching all needed development packages:


root@srv /home/me # apt-get install make libpam0g-dev
...
The following NEW packages will be installed:
  binutils cpp cpp-4.4 gcc gcc-4.4 libc-dev-bin libc6-dev libgmp3c2 libgomp1 libmpfr4 libpam0g-dev
  linux-libc-dev make manpages-dev
...

Then, go and grab the source of the Google Authenticator PAM module from http://code.google.com/p/google-authenticator/downloads/list.

After you got the sources and extracted them from the tarball, you can continue with building the module:


root@srv /home/me # cd libpam-google-authenticator-1.0
root@srv /home/me/libpam-google-authenticator-1.0 # make
...
root@srv /home/me/libpam-google-authenticator-1.0 # make install

Install the module and setup PAM to use it for SSH logins:


cp pam_google_authenticator.so /lib/security
cp google-authenticator /usr/local/bin
vim /etc/pam.d/sshd
...
auth       required     pam_google_authenticator.so
...

Setup SSHD to ask for the verification codes:


vim /etc/ssh/sshd_config
...
ChallengeResponseAuthentication yes
...

Setup the module:


root@srv /home/me/libpam-google-authenticator-1.0 # su me

me@srv:~/libpam-google-authenticator-1.0$ /usr/local/bin/google-authenticator

Do you want authentication tokens to be time-based (y/n) y
 ...
Your new secret key is: ...
Your verification code is ...
Your emergency scratch codes are:
 ...

Do you want me to update your "/home/me/.google_authenticator" file (y/n) y

Do you want to disallow multiple uses of the same authentication
token? This restricts you to one login about every 30s, but it increases
your chances to notice or even prevent man-in-the-middle attacks (y/n) y

By default, tokens are good for 30 seconds and in order to compensate for
possible time-skew between the client and the server, we allow an extra
token before and after the current time. If you experience problems with poor
time synchronization, you can increase the window from its default
size of 1:30min to about 4min. Do you want to do so (y/n) y

If the computer that you are logging into isn't hardened against brute-force
login attempts, you can enable rate-limiting for the authentication module.
By default, this limits attackers to no more than 3 login attempts every 30s.
Do you want to enable rate-limiting (y/n) y

After you did everything correctly, you can try to login via SSH and the system should ask you for your verification code:


login as: me
Using keyboard-interactive authentication.
Verification code:
Using keyboard-interactive authentication.
Password:

To round up your setup, you should not forget to remove the packages you installed to build the Google Authenticator module:


root@srv /home/me/libpam-google-authenticator-1.0 # apt-get autoremove make libpam0g-dev

Links
http://code.google.com/p/google-authenticator/

Fixing US Date Format Bug in the Splunk App for Citrix XenApp

Recently, I was integrating some Citrix XenApp servers into Splunk and decided, to give the Splunk App for Citrix XenApp a try. Integration went fine so far (might need some fiddling with appropriate permissions in XenApp to allow local PowerShell scripts to query XenApp metrics) and soon the indexes were populated with data and the dashboards became usable.

After a while, some data was still missing and I started to investigate. It turned out, that the scripted inputs that run as PowerShell scripts on the XenApp hosts return their timestamps in a format, Splunk interprets wrongly (might be, that the European locale on the Splunk indexers caused the misinterpretation):


10.9.2012 11:05:44 GMT

was interpreted as 10th of September 2012, while it actually was the 9th of October. Of course, this limited (or ruined) the usability of the dashboards :)

Fortunately, this issue can be adressed easily by overriding Splunks automatic timestamp recognition.
Create the file /opt/splunk/etc/apps/SplunkAppForXenApp/local/props.conf on your indexer and add the following lines:


[WMI:ProcessDetails]
TIME_FORMAT = %m.%d.%Y %H:%M:%S
TZ = GMT

[WMI:InstalledSoftware]
TIME_FORMAT = %m.%d.%Y %H:%M:%S
TZ = GMT

[(::){0}xenapp*]
TIME_FORMAT = %m.%d.%Y %H:%M:%S
TZ = GMT

Et voila, from now on the events get timestamped correctly and the dashboards are usable.

For completeness, here is an example of the output generated by the local PowerShell Scripts:


10.9.2012 11:05:44 GMT - AccessSessionGuid="" AccountName="xxx"
ApplicationState="Active" BrowserName="Notepad" ClientAddress="xxx"
ClientBuffers="0 x 0" ClientBuildNumber="6" ClientCacheDisk="0"
ClientCacheLow="3145728" ClientCacheMinBitmapSize="0"
ClientCacheSize="0" ClientCacheTiny="32768" ClientCacheXms="0"
ClientDirectory="C:\PROGRA~1\Citrix\ICACLI~1\" ClientId="3801583231"
ClientIPV4="xxx" ClientName="xxx" ClientProductId="1" ClientType="WI"
ClientVersion="12.0.3.6" ColorDepth="Colors32Bit"
ConnectTime="10/09/2012 13:04:46" CurrentTime="10/09/2012 13:05:44"
DirectXEnabled="True" DisconnectTime="" EncryptionLevel="Bits128"
FlashEnabled="True" HorizontalResolution="1024"
LastInputTime="10/09/2012 13:05:13" LogOnTime="10/09/2012 13:04:58"
MachineName="xxx" Protocol="Ica" ServerBuffers="0 x 0" ServerName="xxx"
SessionId="2" SessionName="ICA-TCP#0" SmartAccessFilters=""
State="Active" UsbEnabled="False" VerticalResolution="2560" VirtualIP=""
WmpEnabled="True" UserName="xxx" FarmName="xxx"
SessionUID="129950318982301678:2:xxx" ScriptRunTime="129950319443893718"

Links
http://splunk-base.splunk.com/apps/48390/splunk-app-for-citrix-xenapp
http://docs.splunk.com/Documentation/Splunk/latest/admin/Propsconf

Monitoring SSL Certificate Expiration with Zabbix

If you run some websites/webservices that run over HTTPS, you might be interested in getting some notice before your SSL Certificate is about to expire. If you already use Zabbix, here is a possible way to do so.

Place this script somewhere accessible for the “zabbix” agent-user on the system to monitor:


#!/bin/bash

# checkcert.sh
# 2012, Looke

# Checks whether a SSL x509 Certificate expires within a specified amount of seconds.
# Takes two arguments: 
# 1. Certificate
# 2. Time Until Expiration in Seconds

OPENSSL=/usr/bin/openssl

if [ -f "$1" ] && [ "$(file -b $1)" == "PEM certificate" ] && [ -n $2 ] && [ $2 -eq $2 2> /dev/null ]
then
        $OPENSSL x509 -noout -checkend $2 -in $1
        if [ $? -gt 0 ]
        then
                echo 1
        else
                echo 0
        fi
fi

Unfortunately there is no way to check the returncode of the command/script in Zabbix, so we have to echo our return value (0 for certificate doesn’t expire within the specified amount of seconds, 1 for certificate does expire).

Also, make sure you have allowed the execution of remote commands in zabbix_agentd.conf:


EnableRemoteCommands=1

Here is how you setup the check in Zabbix:

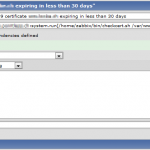
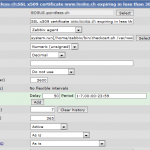
Zabbix Item – Checking if a certificate expires within 30 days (2592000 seconds)
Type: Zabbix agent
Key: system.run[/home/zabbix/bin/checkcert.sh /var/www/www.myvirtualhost.ch/cert/www.myvirtualhost.ch.crt 2592000]
Type of information: Numeric (unsigned)
Data Type: Decimal

Now, add a Trigger based on this Item and you’re ready to go.

More info
http://www.zabbix.com/documentation/1.8/manual/config/items#zabbix_agent

IronPort ESA LDAP Accept Query – Disabled AD Accounts

I recently had the possibility to work on a project where I had to setup and implement an E-Mail gateway using Cisco IronPort Email Security Appliances (ESA) and stumbled over an interesting issue.

If you verify the recipient on incoming mails via an internal ActiveDirectory (only accept mails for people who have a E-Mail address associated to their account in ActiveDirectory), you might find this useful:

To avoid the ESAs from accepting mail for disabled accounts, you have to use a custom accept-query:


(&(|(mail={a})(proxyAddresses=smtp:{a}))(!(userAccountControl:1.2.840.113556.1.4.803:=2)))

This query takes into account, that the ActiveDirectory marks disabled accounts by setting the userAccountControl flag to 0x0002 (decimal 2).

As a comparison, this is the default accept-query:


(|(mail={a})(proxyAddresses=smtp:{a}))

Links
http://support.microsoft.com/kb/305144
http://msdn.microsoft.com/en-us/library/windows/desktop/ms680832%28v=vs.85%29.aspx

Sending Zabbix Alert SMS via USB modem

During some Zabbix sessions, I thought it would be nice to be able to alert via SMS. Zabbix, out of the box, supports the possibility to send SMS via attached GSM modems, so I gave it a try. I am currently using a Huawei USB modem:


Bus 003 Device 011: ID 12d1:1003 Huawei Technologies Co., Ltd. E220 HSDPA Modem / E230/E270/E870 HSDPA/HSUPA Modem

Unfortunately, this modem has some troubles with the AT command sequences Zabbix sends:
/var/log/zabbix-server/zabbix_server.log


   856:20120120:170920.965 Read from GSM modem [^MOK^M]
   856:20120120:170920.965 End of read_gsm():SUCCEED
   856:20120120:170920.965 Write to GSM modem [ATE0^M]
   856:20120120:170920.965 In read_gsm() [OK] [NULL] [NULL] [NULL]
   856:20120120:170921.069 Read from GSM modem [^MOK^M]
   856:20120120:170921.069 In check_modem_result()
   856:20120120:170921.069 End of check_modem_result():SUCCEED
   856:20120120:170921.069 End of read_gsm():SUCCEED
   856:20120120:170921.069 Write to GSM modem [AT^M]
   856:20120120:170921.069 In read_gsm() [OK] [NULL] [NULL] [NULL]
   856:20120120:170921.173 Read from GSM modem [^MOK^M]
   856:20120120:170921.174 In check_modem_result()
   856:20120120:170921.174 End of check_modem_result():SUCCEED
   856:20120120:170921.174 End of read_gsm():SUCCEED
   856:20120120:170921.174 Write to GSM modem [AT+CMGF=1^M]
   856:20120120:170921.174 In read_gsm() [OK] [NULL] [NULL] [NULL]
   856:20120120:170921.277 Read from GSM modem [^MOK^M]
   856:20120120:170921.277 In check_modem_result()
   856:20120120:170921.277 End of check_modem_result():SUCCEED
   856:20120120:170921.277 End of read_gsm():SUCCEED
   856:20120120:170921.277 Write to GSM modem [AT+CMGS="]
   856:20120120:170921.277 Write to GSM modem [0041791234567]
   856:20120120:170921.277 Write to GSM modem ["^M]
   856:20120120:170921.277 In read_gsm() [> ] [NULL] [NULL] [NULL]
   856:20120120:170921.385 Read from GSM modem [^M> ]
   856:20120120:170921.385 In check_modem_result()
   856:20120120:170921.385 End of check_modem_result():SUCCEED
   856:20120120:170921.385 End of read_gsm():SUCCEED
   856:20120120:170921.385 Write to GSM modem [Host xyz is unreachable: PROBLEM]
   856:20120120:170921.385 Write to GSM modem [^Z]
   856:20120120:170921.385 In read_gsm() [+CMGS: ] [NULL] [NULL] [NULL]
   856:20120120:170921.489 Read from GSM modem [^M]
   856:20120120:170921.489 In check_modem_result()
   856:20120120:170921.489 End of check_modem_result():FAIL
   856:20120120:170921.489 End of read_gsm():FAIL
   856:20120120:170921.489 Write to GSM modem [^MESC^Z]
   856:20120120:170921.489 In read_gsm() [] [NULL] [NULL] [NULL]
   856:20120120:170921.489 Error during wait for GSM modem.
   856:20120120:170921.489 Read from GSM modem []
   856:20120120:170921.489 End of read_gsm():SUCCEED
   856:20120120:170921.494 End of send_sms():FAIL
   856:20120120:170921.494 End execute_action()
   856:20120120:170921.494 Error sending alert ID [62]

After some research I figured out that it probably would be a better idea to write a wrapper-script to implement the SMS functionality. There is actually a way to fix this AT command sequence issue, but it would require recompiling some parts of Zabbix (which is not an option for me, as I use the Debian packaged Zabbix). To interface with the modem, I am finally using Gnokii:

/etc/zabbix/gnokii.conf


[global]
port = /dev/ttyUSB1
model = AT
connection = serial

Thats the script I use to send the alerts to (taken straight from zabbix.com):

/etc/zabbix/alert.d/zabbix-sms.sh


#!/bin/sh 
LOGFILE="/var/log/zabbix-server/zabbix-sms.log" 
echo "To: '$1' Text: '$3'" >> ${LOGFILE} 
PHONENR=`echo "$1" | sed s#\s##` 
/bin/echo "$3" | /usr/bin/gnokii --config /etc/zabbix/gnokii.conf --sendsms "${PHONENR}" 1>>${LOGFILE} 2>&1

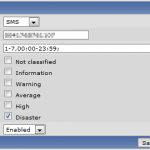
Here are some screenshots on how to configure the SMS alert in the Zabbix GUI:

Links
http://www.zabbix.com/wiki/howto/config/alerts/sms
http://lab4.org/wiki/Zabbix_Medien_einrichten

Mounting LVM nested Partitons

With this post, I want to describe how you can mount partitions, nested within LVM volumes. A possible use-case includes file based backup of virtual machines running on LVM volumes.

In the example below, I use a Windows Server 2008 system partition (NTFS). The Windows server is running on a Debian KVM system.

You will need:

  • kpartx
  • (In this exampe also ntfs-3g)

Lets get started – first some information about the LVM setup:


root@SERVER:/# lvdisplay
  --- Logical volume ---
  LV Name                /dev/lvm/windoze2k8
  VG Name                lvm
  LV UUID                836UYu-lmuT-qCUg-2lRx-QNgZ-COf7-h6NUH6
  LV Write Access        read/write
  LV Status              available
  # open                 0
  LV Size                19.53 GiB
  Current LE             5000
  Segments               1
  Allocation             inherit
  Read ahead sectors     auto
  - currently set to     256
  Block device           254:1

The partition table of our LVM volume:


root@SERVER:/# fdisk -l /dev/lvm/windoze2k8

Disk /dev/lvm/windoze2k8: 21.0 GB, 20971520000 bytes
255 heads, 63 sectors/track, 2549 cylinders
Units = cylinders of 16065 * 512 = 8225280 bytes
Sector size (logical/physical): 512 bytes / 512 bytes
I/O size (minimum/optimal): 512 bytes / 512 bytes
Disk identifier: 0x1a13ce21

                       Device Boot      Start         End      Blocks   Id  System
/dev/lvm/windoze2k81   *           1        2550    20477952    7  HPFS/NTFS

Now, lets move on to the the actual doing:


root@SERVER:~# kpartx -a /dev/lvm/windoze2k8
root@SERVER:~# mkdir /mnt/lvm-windoze2k81 && mount /dev/mapper/lvm-windoze2k81 /mnt/lvm-windoze2k81

Et voila:


root@SERVER:~# ls /mnt/lvm-windoze2k81
autoexec.bat  bootmgr       config.sys              hiberfil.sys  PerfLogs     Program Files  System Volume Information  Windows
Boot          BOOTSECT.BAK  Documents and Settings  pagefile.sys  ProgramData  $RECYCLE.BIN   Users

To remove the mapping, do the following:


root@SERVER:/# umount /mnt/lvm-windoze2k81
root@SERVER:/# kpartx -d /dev/lvm/windoze2k8

Note
If you want to use such a setup to do file based backup of running virtual machines, it is wise to create a LVM snapshot first and applying kpartx on the snapshot device.

Windows Eventlogs to Syslog

Because central logging is so awesome and widely used in the Linux/Unix world, I want to show you a way how you can also gather Windows Event Logs through the good old Syslog Server.

  • On the server side, its quite simple: Use the plain vanilla Syslog or use something with Syslog capabilities (e.g. Rsyslog or even better Splunk).
  • On your Windows System, get eventlog-to-syslog (http://code.google.com/p/eventlog-to-syslog), put the two program files in C:\Windows\System32 and install it as a service as described below:
    
    C:\Users\administrator>evtsys -i -h <SYSLOGHOST>
    Checking ignore file...
    Aug 23 20:27:25 HOSTNAME Error opening file: evtsys.cfg: The system cannot find
    the file specified.
    
    Aug 23 20:27:25 HOSTNAME Creating file with filename: evtsys.cfg
    Command completed successfully
    
    C:\Users\administrator>net start evtsys
    The Eventlog to Syslog service is starting.
    The Eventlog to Syslog service was started successfully.
    

Here are the options for eventlog-to-syslog:


Version: 4.4 (32-bit)
Usage: evtsys -i|-u|-d [-h host] [-b host] [-f facility] [-p port]
       [-t tag] [-s minutes] [-l level] [-n]
  -i           Install service
  -u           Uninstall service
  -d           Debug: run as console program
  -h host      Name of log host
  -b host      Name of secondary log host
  -f facility  Facility level of syslog message
  -l level     Minimum level to send to syslog.
               0=All/Verbose, 1=Critical, 2=Error, 3=Warning, 4=Info
  -n           Include only those events specified in the config file.
  -p port      Port number of syslogd
  -q bool      Query the Dhcp server to obtain the syslog/port to log to
               (0/1 = disable/enable)
  -t tag       Include tag as program field in syslog message.
  -s minutes   Optional interval between status messages. 0 = Disabled

Default port: 514
Default facility: daemon
Default status interval: 0
Host (-h) required if installing.

List based permanent bans with fail2ban

Today I post something about the nice little tool fail2ban. As you probably know, fail2ban can be used to block those annoying brute force attacks against your servers. Other than the also popular and useful tool DenyHosts it allows the protection of other services than SSH as well (e.g. HTML login pages served by Apache). The working mechanism also differs from that of DenyHosts, as fail2ban uses iptables instead of the BSD style hosts.deny file to block annoying brute forcers. Installation is quite simple, on Debian for example, just install it through apt and you’re good to go even with the default config.

One thing that I was missing, was the option to ban IPs forever. You can basically do this by setting bantime to a negative value, but as soon as you reload your iptables rules (e.g. by restarting the fail2ban service or the whole system) the entries for the permanently banned IPs are gone.
To overcome this issue, I did some minor changes to the actions fail2ban executes on start-up and on banning.

IMPORTANT: I strongly advise you, to be careful while playing around with automated banning tools, especially if you can’t reach your server physically. Make sure, that you have something useful set in the ignoreip option under the [DEFAULT] jail (your current IP address) to not accidentally lock you out of the system (really nasty with permanent banning active…)

  1. First, check the banaction currently used (you need that, to modify the correct actionfile afterwards)
    /etc/fail2ban/jail.local

    
    #
    # ACTIONS
    #
    ...
    banaction = iptables-multiport
    ...
    
  2. Open up the corresponding actionfile and modify according to the sample below (changes are under the # Persistent banning of IPs comment)
    /etc/fail2ban/action.d/iptables-multiport.conf

    
    ...
    actionstart = iptables -N fail2ban-<name>
                  iptables -A fail2ban-<name> -j RETURN
                  iptables -I INPUT -p <protocol> -m multiport --dports <port> -j fail2ban-<name>
                  # Persistent banning of IPs
                  cat /etc/fail2ban/ip.blacklist | while read IP; do iptables -I fail2ban-<name> 1 -s $IP -j DROP; done
    ...
    actionban = iptables -I fail2ban-<name> 1 -s <ip> -j DROP
                # Persistent banning of IPs
                echo '<ip>' >> /etc/fail2ban/ip.blacklist
    ...
    
  3. Your blacklist should look something like this (one IP per line, of course you can add IPs manually)
    /etc/fail2ban/ip.blacklist

    
    ...
    10.0.0.242
    192.168.1.39
    ...
    
  4. Restart fail2ban to make the changes active

Now, what happens is that each time fail2ban starts, it loops through your ip.blacklist and blocks the IPs in there. If fail2ban blocks a new IP, it will automatically append it to the blacklist.

Links
http://www.fail2ban.org
http://www.fail2ban.org/wiki/index.php/Whitelist
http://denyhosts.sourceforge.net

Update
The following config adds some nice features that were missing in the example above:

  • No duplicate iptables rules (@Lin: might be interesting for you)
  • Jail specific blocking rules (similar to Dr. Tyrell’s and samuelE’s suggestions in the comments)
  • Reporting offender IPs to badips.com

/etc/fail2ban/action.d/iptables-multiport.conf:


# Fail2Ban configuration file
#
# Author: Cyril Jaquier
# Modified by Yaroslav Halchenko for multiport banning and Lukas Camenzind for persistent banning 
#
#
[Definition]
# Option:  actionstart
# Notes.:  command executed once at the start of Fail2Ban.
# Values:  CMD
#
actionstart = iptables -N fail2ban-<name>
              iptables -A fail2ban-<name> -j RETURN
              iptables -I INPUT -p <protocol> -m multiport --dports <port> -j fail2ban-<name>
              # Load local list of offenders
              if [ -f /etc/fail2ban/ip.blacklist ]; then cat /etc/fail2ban/ip.blacklist | grep -e <name>$ | cut -d "," -s -f 1 | while read IP; do iptables -I fail2ban-<name> 1 -s $IP -j DROP; done; fi
# Option:  actionstop
# Notes.:  command executed once at the end of Fail2Ban
# Values:  CMD
#
actionstop = iptables -D INPUT -p <protocol> -m multiport --dports <port> -j fail2ban-<name>
             iptables -F fail2ban-<name>
             iptables -X fail2ban-<name>
# Option:  actioncheck
# Notes.:  command executed once before each actionban command
# Values:  CMD
#
actioncheck = iptables -n -L INPUT | grep -q fail2ban-<name>
# Option:  actionban
# Notes.:  command executed when banning an IP. Take care that the
#          command is executed with Fail2Ban user rights.
# Tags:    <ip>  IP address
#          <failures>  number of failures
#          <time>  unix timestamp of the ban time
# Values:  CMD
#
actionban = if ! iptables -C fail2ban-<name> -s <ip> -j DROP; then iptables -I fail2ban-<name> 1 -s <ip> -j DROP; fi
            # Add offenders to local blacklist, if not already there
            if ! grep -Fxq '<ip>,<name>' /etc/fail2ban/ip.blacklist; then echo '<ip>,<name>' >> /etc/fail2ban/ip.blacklist; fi
            # Report offenders to badips.com
            wget -q -O /dev/null www.badips.com/add/<name>/<ip>
# Option:  actionunban
# Notes.:  command executed when unbanning an IP. Take care that the
#          command is executed with Fail2Ban user rights.
# Tags:    <ip>  IP address
#          <failures>  number of failures
#          <time>  unix timestamp of the ban time
# Values:  CMD
#
actionunban = iptables -D fail2ban-<name> -s <ip> -j DROP
              # Disabled clearing out entry from ip.blacklist (somehow happens after each stop of fail2ban)
              # sed --in-place '/<ip>,<name>/d' /etc/fail2ban/ip.blacklist
[Init]
# Defaut name of the chain
#
name = default
# Option:  port
# Notes.:  specifies port to monitor
# Values:  [ NUM | STRING ]  Default:
#
port = ssh
# Option:  protocol
# Notes.:  internally used by config reader for interpolations.
# Values:  [ tcp | udp | icmp | all ] Default: tcp
#